BEST DEALS OF THE DAY Not many people are comfortable with the idea of designing their own website, which is why there are many companies offering their DIY web services. Portfolio is Adobe's offering, as long as you're a Creative Cloud subscriber. As you'd expect from a creative endeavor, the websites that Adobe will help you build are all about showcasing your creative work. When you access Adobe's Portfolio page, you can choose between two types of sites: a "Full Portfolio" of your work, or a "Welcome Page."
- Adobe Wallet on Amazon for € 35.20
Whichever you choose, you will have the option to add additional pages and create a complete site. For the purposes of this review, we have chosen the Portfolio option.

Choose the type of site you want to create and choose from a handful of templates (Image credit: Adobe)
Contac us
There are 12 themes to choose from. Large previews give you an idea of what you're going to create. They also include a little thumbnail of what each theme will look like on a mobile device, which is a fun way to let you know that all of these sites are designed to look great no matter what device you're viewing them from. Click on any of them to see a full page preview, with the option to check out the design on other screens (desktop, tablet or phone). Once you have selected your theme (which you can change at any time), the main interface is activated. It is divided into two sections. The larger one on the right is where you'll design and preview your pages, while the sidebar on the left is where you can control various settings.

Link to other Adobe Creative Cloud services (Image credit: Adobe) One of these, called 'Integration', can be very useful if you already use other Adobe services - this is where you can link your Behance account, a library of Lightroom stored online or photos you're currently sharing to Adobe Stock. This allows you to connect your new website to any of them to import content directly. But let's properly start this scan by looking at the main preview area.
The design area
This entire section is where you create your pages. As mentioned above, these pages are designed to showcase your work, which currently appears empty with an "Add Page" button to the left. You can use it to create a page as shown or set up a link to one of your Lightroom albums.
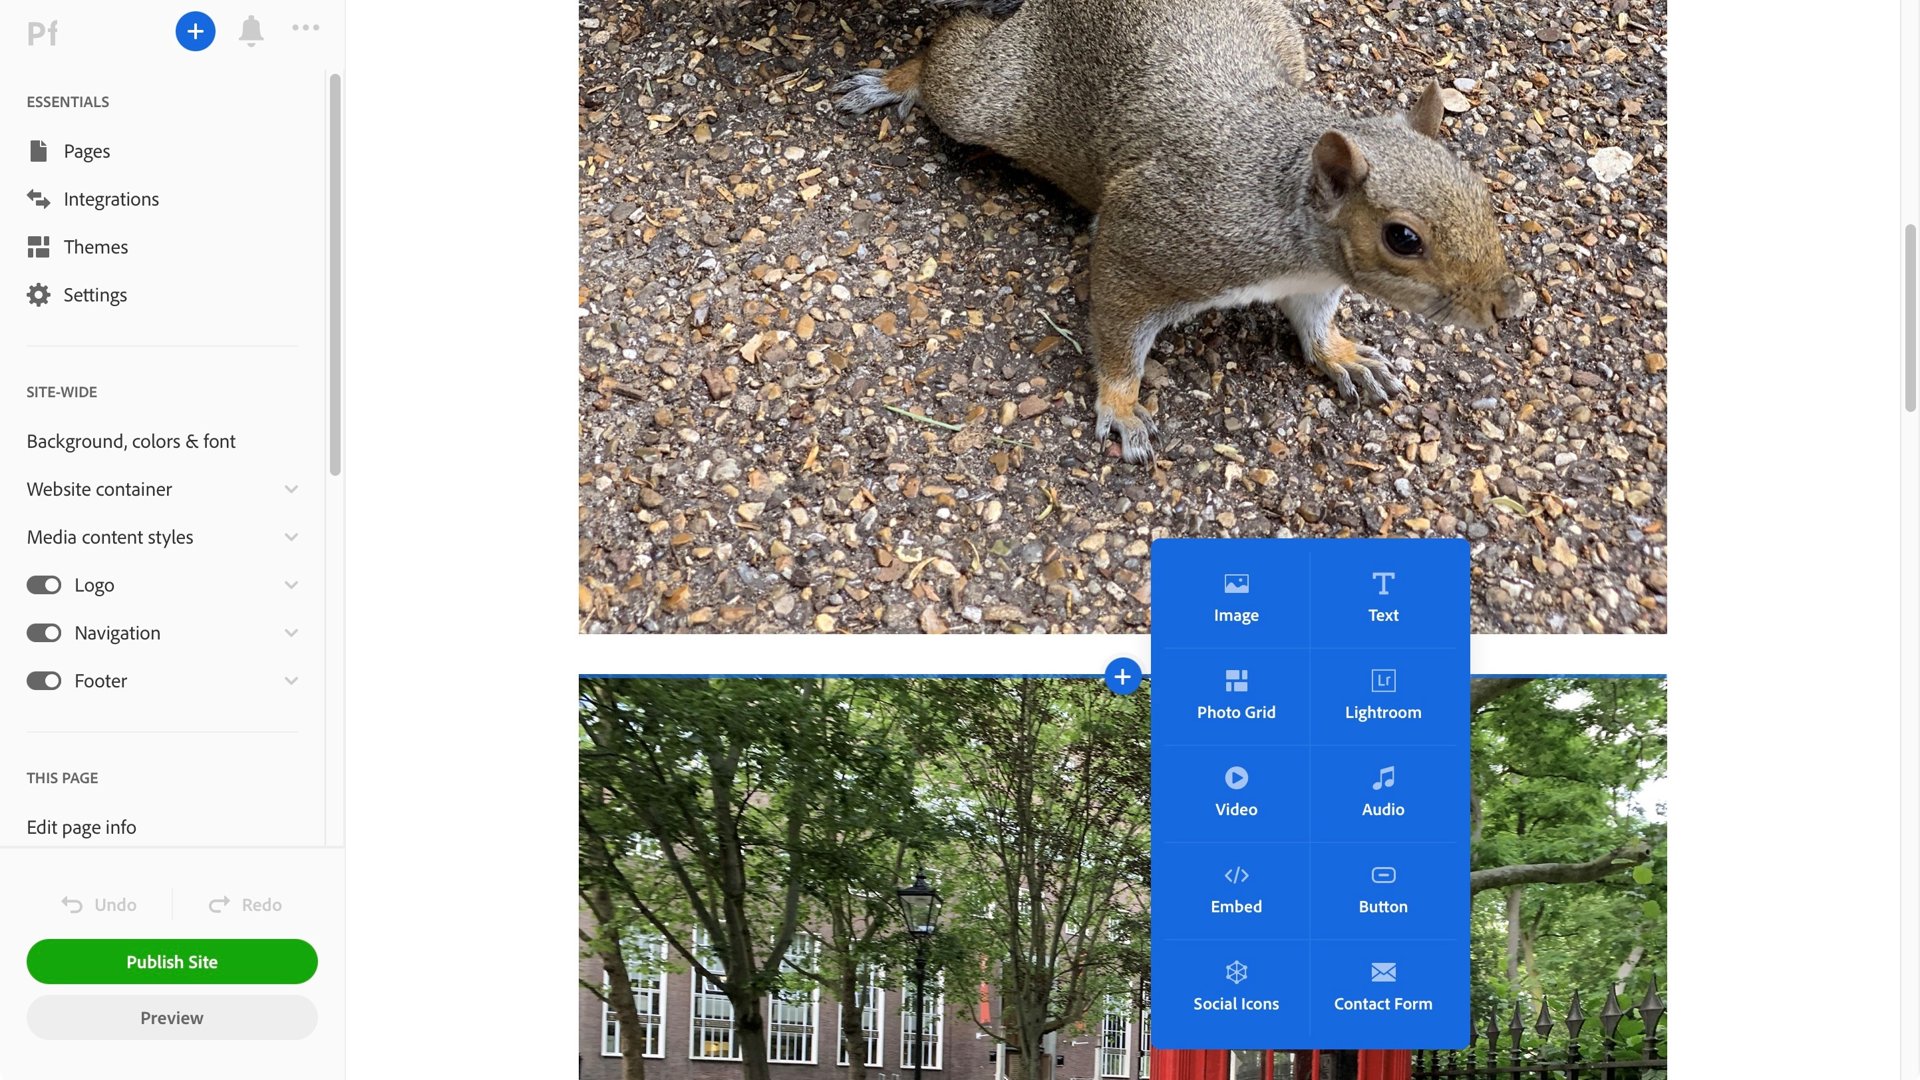
You can add multiple sections to your pages, just like a classic website builder (Image credit: Adobe) Creating a page is very easy. You're presented with buttons to add images, text, videos, social media icons, forms, and even a link to a Lightroom album and audio file. There is also a way to embed HTML code directly. Once you've added something, those buttons disappear, but you can access the same menu by clicking any blue cross-shaped button that appears when you mouse over your page. You fill your page with your photos that you can import one by one, or in groups. By default, the photos are displayed on top of each other, but you can also create photo grids and control how your images are presented on the screen. Everything is very simple and you will become familiar with the interface in no time. We found that sometimes a photo wouldn't load, but it wasn't hard to replace the broken link with a fresh copy.
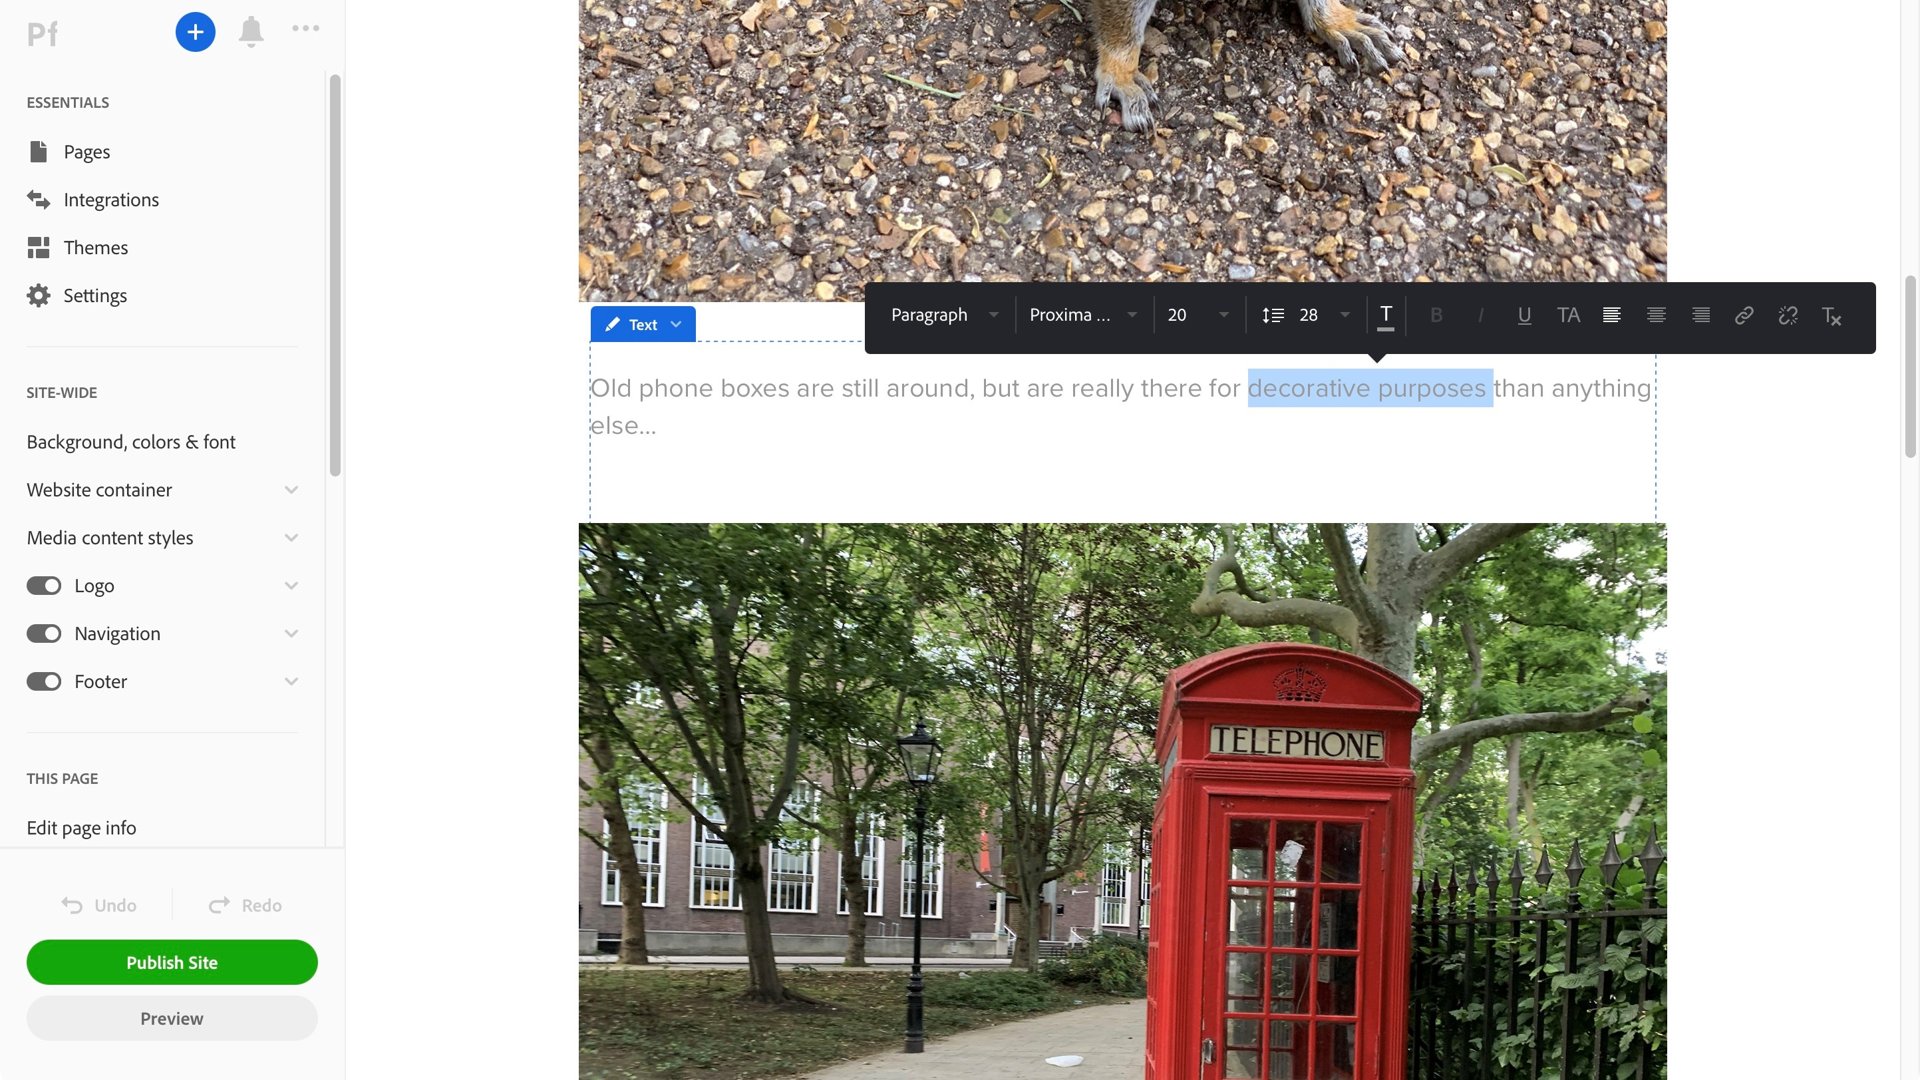
It has a handful of traditional customization options when editing text (Image credit: Adobe) As mentioned above, you're not limited to adding photos to your website. You also have the option to include text boxes, creating what could be considered a more traditional web page, although that's not Portfolio's main focus. Just like adding captions, it has basic text-editing tools, though these only appear after you highlight typed text. Frustratingly, every time we added a section of text, the page would come back to the top and we would have to go back to where we were before to start typing. If you make videos, you upload them like you would a photo. If you'd rather share a video that you've posted to another site like YouTube or Vimeo, this is where the Embed feature comes into play. However, despite the fact that many website builders we've tested in the past, such as WordPress or EverWeb, it knows what to do when you paste the YouTube video URL into an embed field and converts it to the code needed to embed it correctly. , Portfolio has adopted the more archaic method of requiring the actual embed code to work. It's not a complicated process, and video hosting sites make it easy to get it directly from their sharing options, but it's a more time-consuming process than just pasting in a URL.
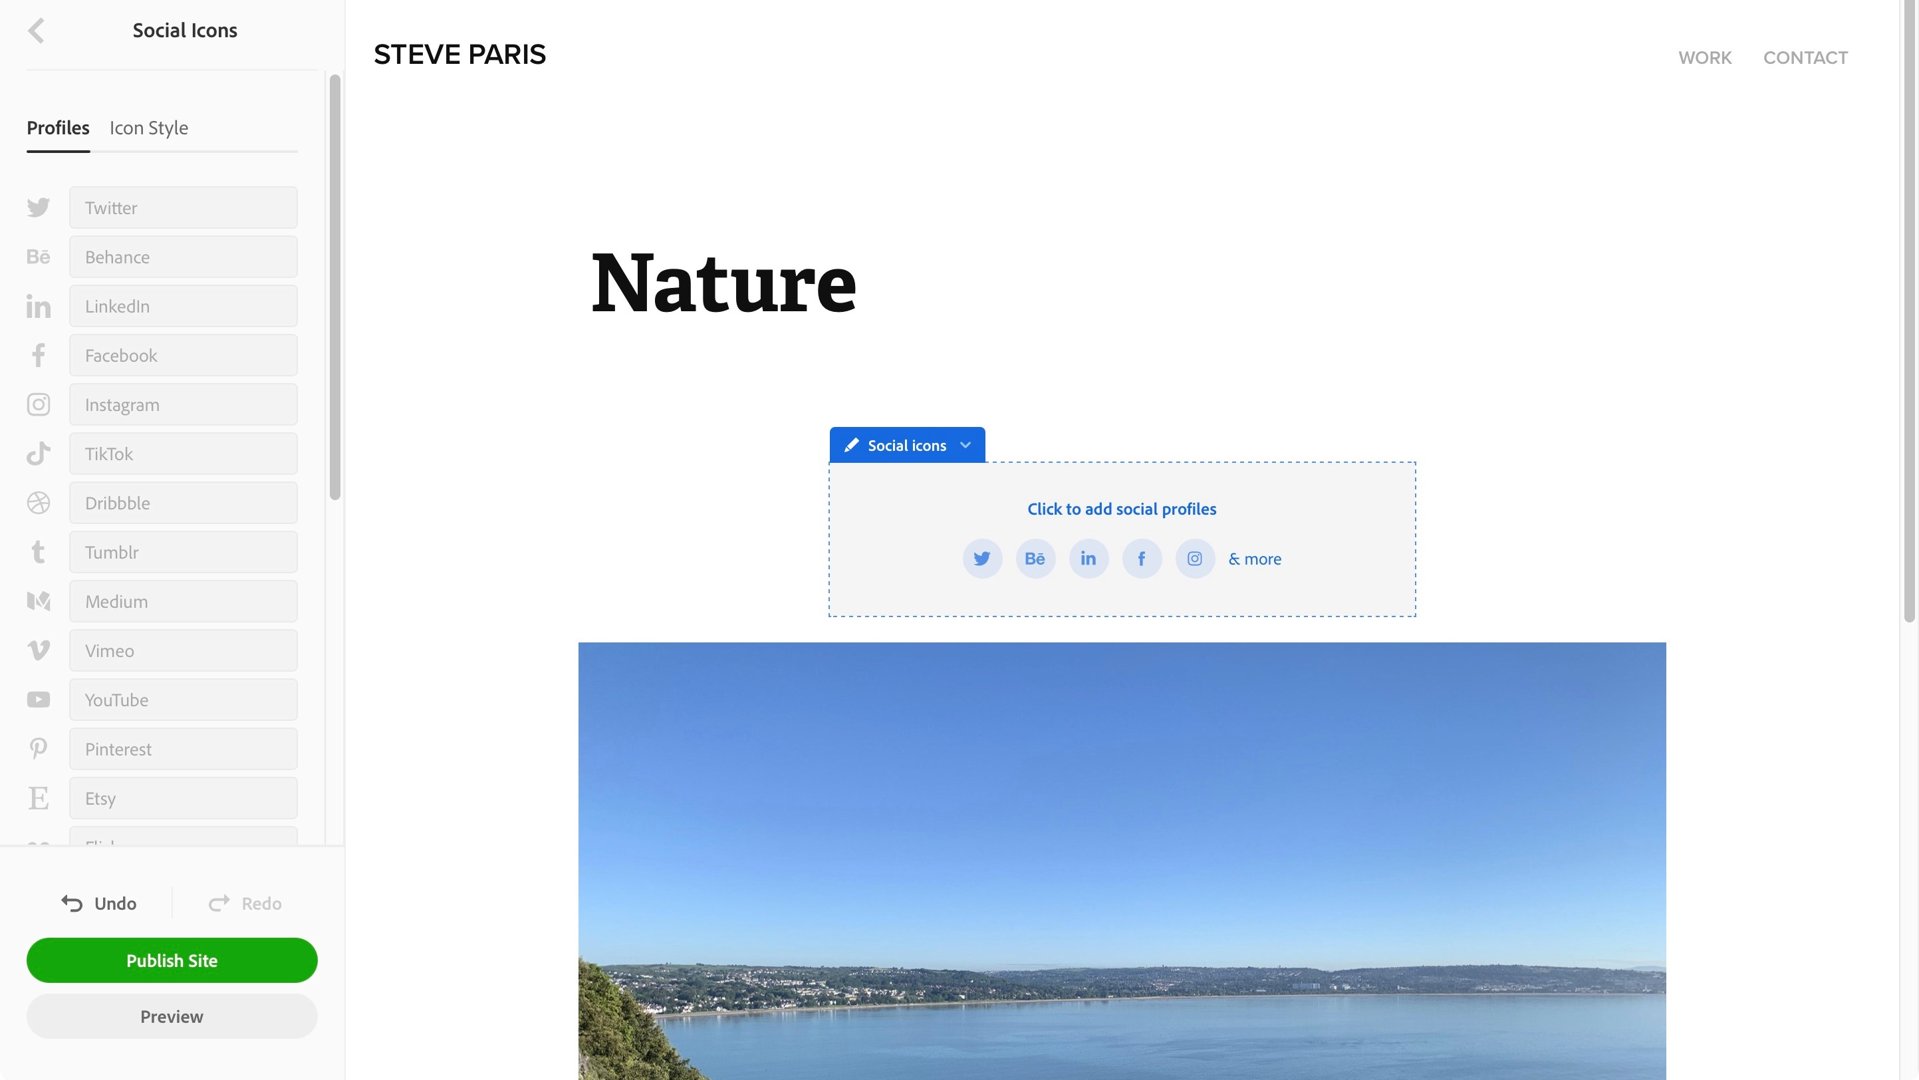
Logging into your social media account could be a lot less frustrating than it is (Image credit: Adobe) One of your options is to add a social media bar to your page to link viewers to your different accounts. However, how to do this is more complicated than it should be: clicking this section replaces the sidebar with a long list of social networking sites. You might think that to create a link, all you have to do is add your nickname in the corresponding fields. However, this is not the case: instead of just typing ''in the Twitter section, for example, you have to enter the full URL, i.e. 'twitter/com/'. It's very frustrating, especially since the field in question is specifically for Twitter, so note that the URL starts with "twitter.com". Essayer d'ajouter una URL Twitter à un otro champ de réseau social (comme LinkedIn para exemple), conduit également à une erreur - c'est-à-dire que les champs savedent attendre une entrée specifique, mais vous obligent à saisir l' full address. This is unnecessarily harder than it sounds.
Customization
You can just add content as described above and leave it there, but if you want a bit more customization, you'll find hidden options in several places. They appear when you click on an item's blue menu (top left of that item). For example, click an image's menu to add alt text, caption, link to a URL, or change the photo's margins. Do the same at the top of the page, the menu labeled "Page Container," to see the sidebar replaced by a series of sliders that will help you change your page's margins and alignment.
Pages
Depending on where you add a page, the result will be different: add one from the sidebar, so it appears in the navigation menu at the top of your website. However, you can also add a page within any of these pages, but it is then rendered as large thumbnails within the page it was created on. At first, this can confuse beginners who wonder why the new page they created doesn't appear in the top menu, or why it doesn't have a large thumbnail preview. However, it's easy to use the sidebar to drag these pages around, if you've accidentally created one in the wrong place.

The preview section allows you to see how your site will look when viewed on multiple devices (Image credit: Adobe) There is a cool preview option that allows you to see how your site would look on multiple screens, including tablets and phones in both landscape and portrait orientation. This is where you can access settings that affect your entire site. Here are two main features: One allows you to make site-wide changes like adding a background image, selecting its placement on the page, managing your pages (both first pages and pages within pages), renaming them and rearrange them, and even switch to a completely different theme. The configuration options are quite extensive. You can select which of your best pages will be the main one (the one visitors will see first), connect your site to Google Analytics, add SEO keywords and meta tags, upload a favicon, and even set a specific 404 page (by default, it links to your home page). If you're concerned about protecting your images, you have the option to disable right-clicking on your photos (this isn't selected by default, but when enabled, it will deter the most casual content thief), and you can even password-protect your entire image. website. You can create up to five websites from a single Creative Cloud account, and they can be as large or as simple as you want. Adobe hosts the sites for you and provides you with a .myportfolio.com Address (the name is selected automatically but you are allowed to change it to something more appropriate, as long as it is available. If you have a domain name, you can connect it to your site and you also have the option to purchase one directly from the Settings menu.
Final verdict
Overall, Portfolio strikes an interesting balance. If you just want to upload photos to share with others and use a site to show off your skills, you can be up and running in minutes. But you also have the option to fully customize your site to make it look the way you want it to. There are some confusing aspects of the interface, and it can feel a bit sluggish at times, but it creates some beautiful pages, giving you as much customization as you feel comfortable with. Simply icing on the cake is being free with your Creative Cloud membership. THE BEST DEALS OF THE DAY