Alright my fellow Chrome OS adventurer, see if this progression sounds familiar:
- First: "Ooh look! My Chromebook is getting a big update this week! New exciting features! SO EXCITING!"
- Then: "Oh. The update is here, but everything looks the same. Where is all the new stuff? Very disappointing."
It's an all too common pairing here in the country where Googley counts, and that exact progression is playing out for many impatient Chromebook owners right now.
Have you ever felt it? This latest move up and down was sparked when Google made a flashy announcement about its 100th version of Chrome OS the other day, including, notably, the extended release of a new revamped Chromebook launcher (ooh, ahh, etc. ).
It's part of Chrome OS 100, we heard! It will give a whole new look to your favorite Chromebook! This will change the way you use your computer, make it last!
Extract, uh, it's not actually enabled by default. Not yet. Even after you get the Chrome OS 100 update, which you probably already have, this fancy new setup won't be there. Not where you can see it, anyway.
It is a disappointment. But you don't have to.
Today we're going to delve into the guts of your Chromebook to find the hidden switches to activate this awesome new launcher, as well as a handful of other extremely useful new systems. Technically, they are all already on your device. They're just hidden out of sight, and it's up to you to dig them up and activate them.
Let's go caving, okay?
Chrome OS Treasure #1: A New and Improved Launcher
We'll start with this sneaky new launcher. No normal body will ever know, but you can avoid waiting for Google to implement it and activate the updated Chrome OS launcher right now by following these quick and easy steps:
- Take chrome: flags in the address bar of any Chrome browser window.
- Take app launcher in the search field on the screen that appears.
- See the row titled "Productivity Test: App Launcher"? Click the box next to it and change its setting from "Default" to "Enabled."
- Click the blue Restart button at the bottom of the screen.
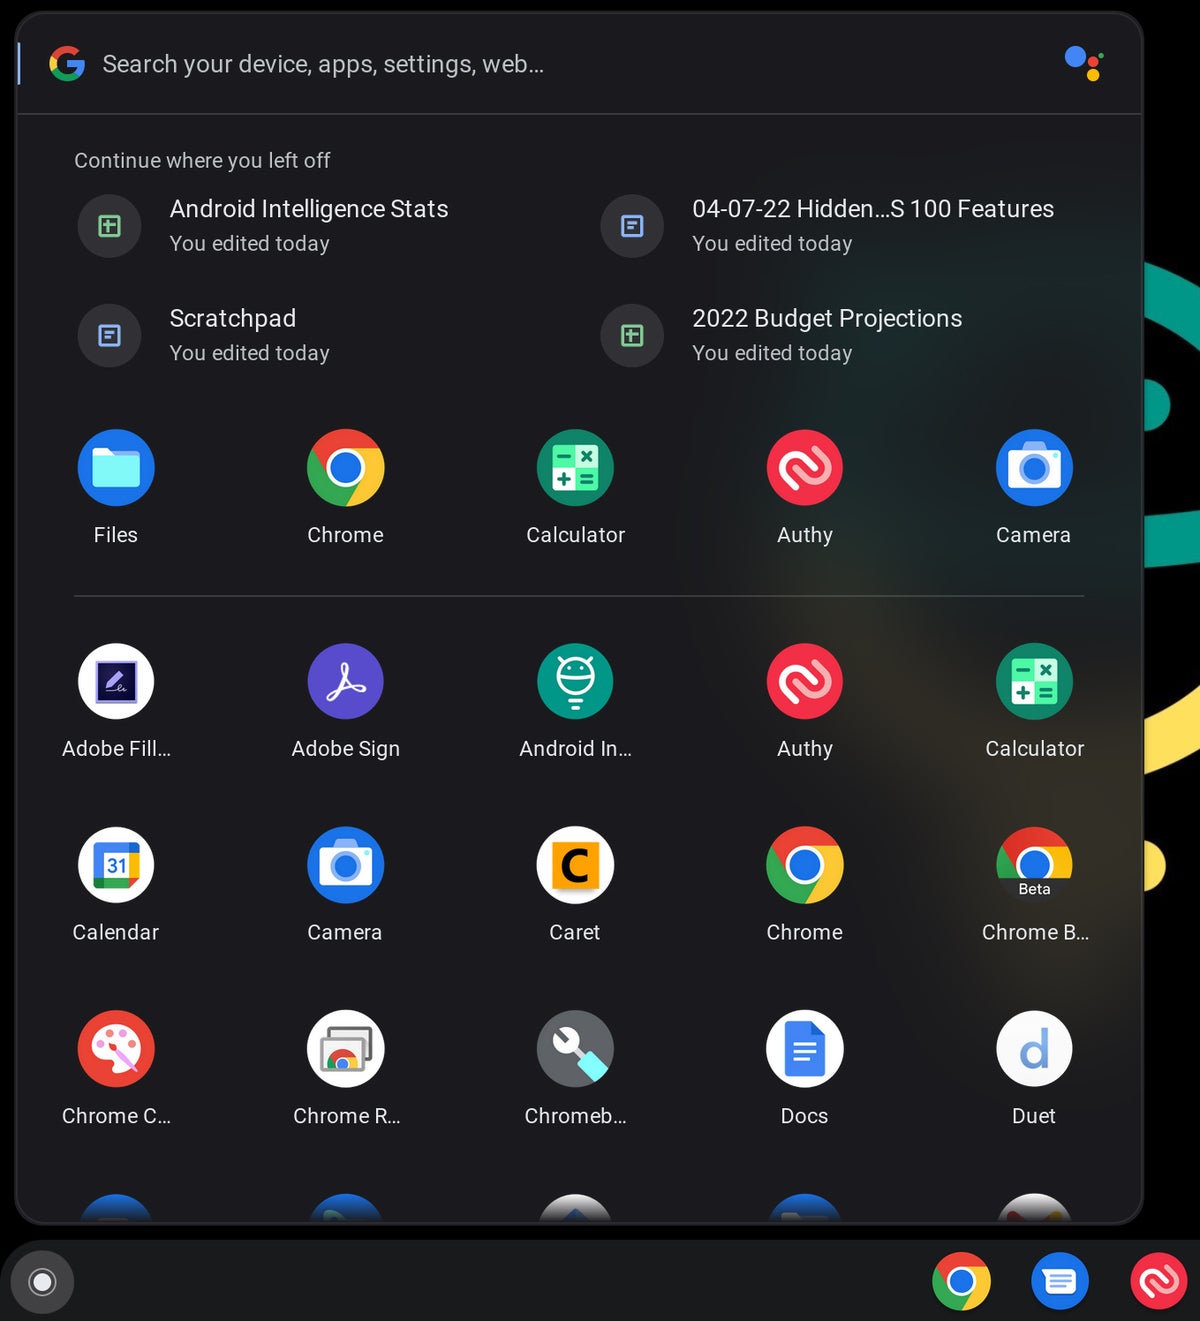
And that's it: once your Chromebook has rebooted, you should be able to click the circle icon in the bottom left corner of the screen or press the corresponding All button on your keyboard, and, ta-da:
 JR
JR Isn't she pure? Other than that, this revamped Chrome OS launcher actually lets you automatically sort your apps by name or color (go figure!). Just right click or two fingers on any open area at the bottom of the launcher to find related options.
(*4*) JRThe new launcher also includes a ton of helpful contextual information at the top and fully integrates with Google Assistant so you can get all sorts of great answers on the spot.
Chrome OS Treasure #2: A Smarter Status Bar
Next, as we look at the bottom edge of your Chromebook screen, let's inject some extra productivity-boosting power into its bottom-right corner. It's a good solution: a seemingly basic integration that has been missing for a long time and will provide a huge boost to the efficiency of your workday.
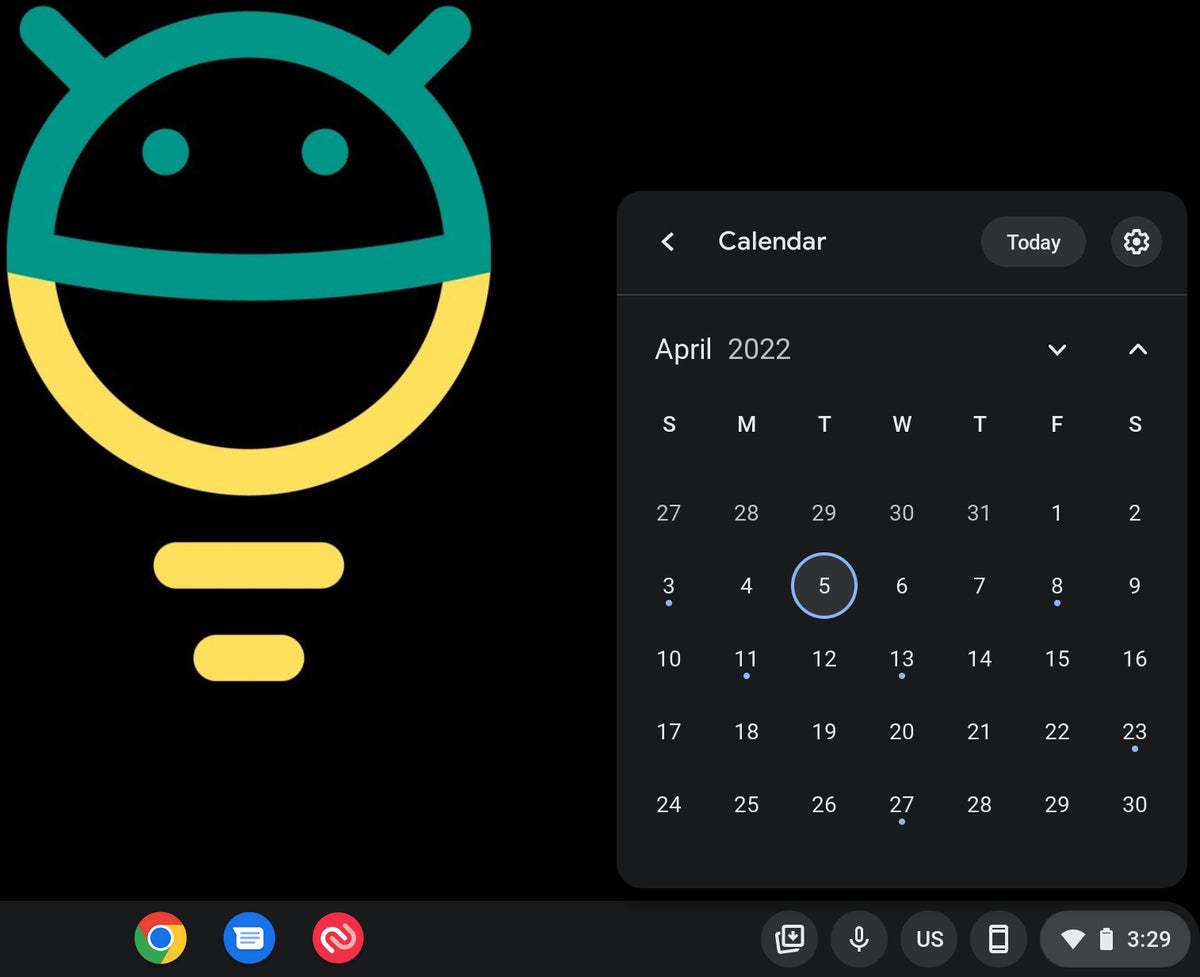
I won't keep you waiting - this is a real calendar view, even connected to Google Calendar! - directly in the Quick Settings area of your Chromebook.
Just click on the inconspicuous little date text in that pop-up panel and lo and behold:
 JR
JR A true functional calendar! He! Where you can easily access, anytime, no matter what you're doing! CAN YOU BELIEVE IT?!
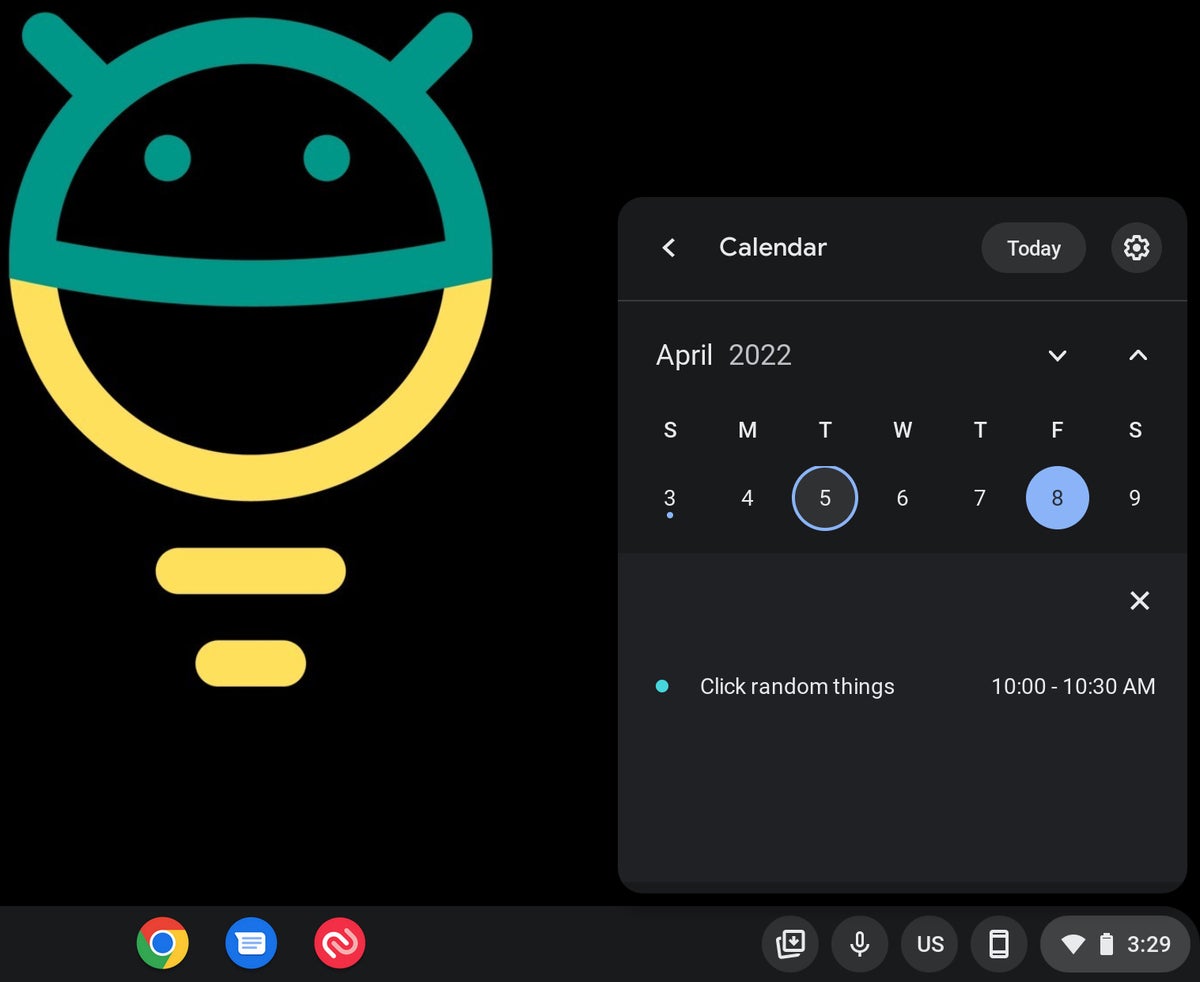
Oh, and there's more: if you click on a date that has a dot that represents an event, you can also see the information on the spot:
 JR
JR Clicking on the event itself from there will bring up its details page on the Google Calendar website.
Not bad right?
To activate it:
- Again, write chrome: flags in the address bar of your browser.
- This time find the word calendar.
- Find the line labeled "Productivity Experience: Monthly Calendar View" and change the setting next to "Default" to "On."
- Soften the Restart button for the changes to take effect.
Ah - so calendar.
Chrome OS Treasure #3: A Desktop Recording System
If you're completely deranged and delightfully organized like I am, you probably have a specific set of apps and websites that you open whenever you're working on certain types of tasks. And opening them over and over again can become a hassle.
Well, worry no more: your Chromebook has an amazing new way to save you time and set up your desktop for you, with as many specific fixes as your beautiful, sodden brain demands.
Once the feature is enabled, you'll see a new option on the Chrome OS overview screen: that broad view of your currently open windows and apps that appears when you press the key with a square that has two vertical lines next to it (usually where would F4 go):
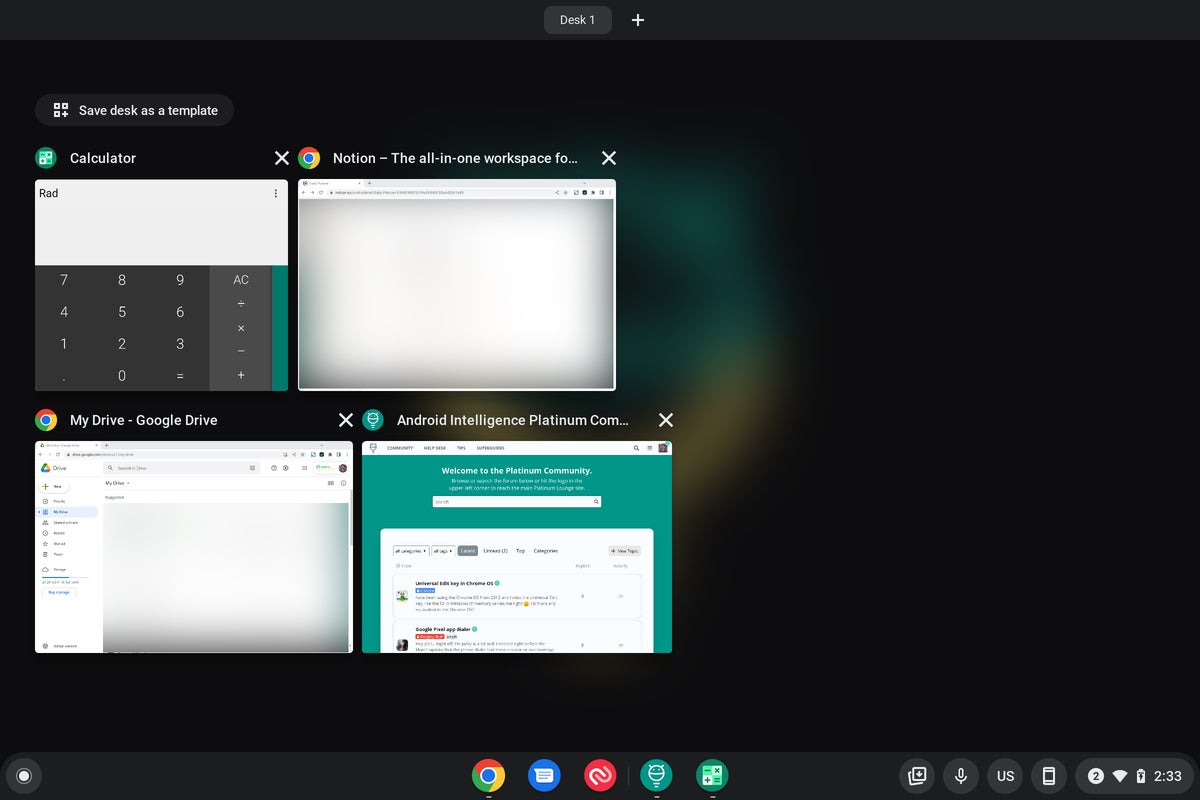 JR
JR See the new "Save Desktop as Template" option at the top? Click on it, click with enthusiasm! - and you can save this exact set of open items as a template for future restores. Then it will appear in a new "Models" area of this same presentation interface:
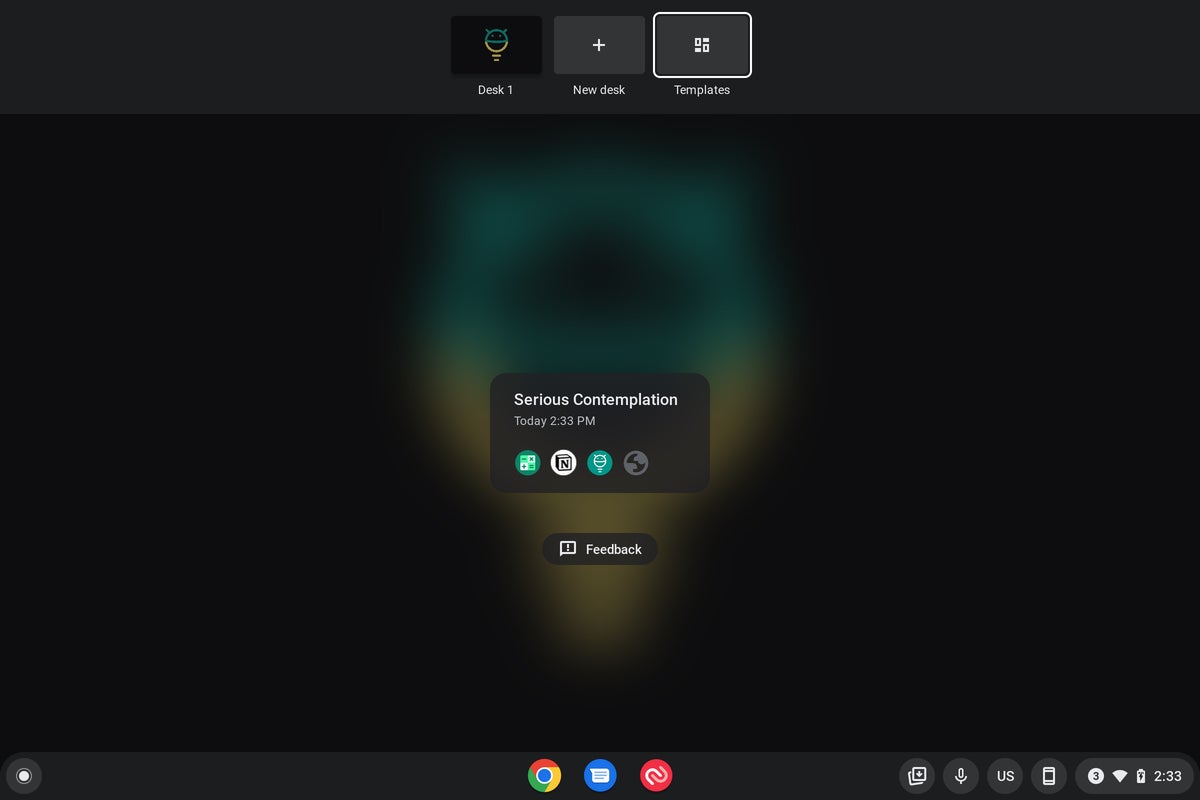 JR
JR And with one more click, you can wake up that same set of apps and windows in no time.
To activate it:
- Again, write chrome: flags in the address bar of your browser.
- find the word business.
- Find the line labeled "Desktop Templates" and change the setting next to the "Enabled" position.
- Hit that damn reset button and laugh with delight.
Now all you have to do is press the Summary button on your Chromebook's keyboard when the system returns and find your new option on the screen.
Chrome OS Treasure #4: A File Recovery Center
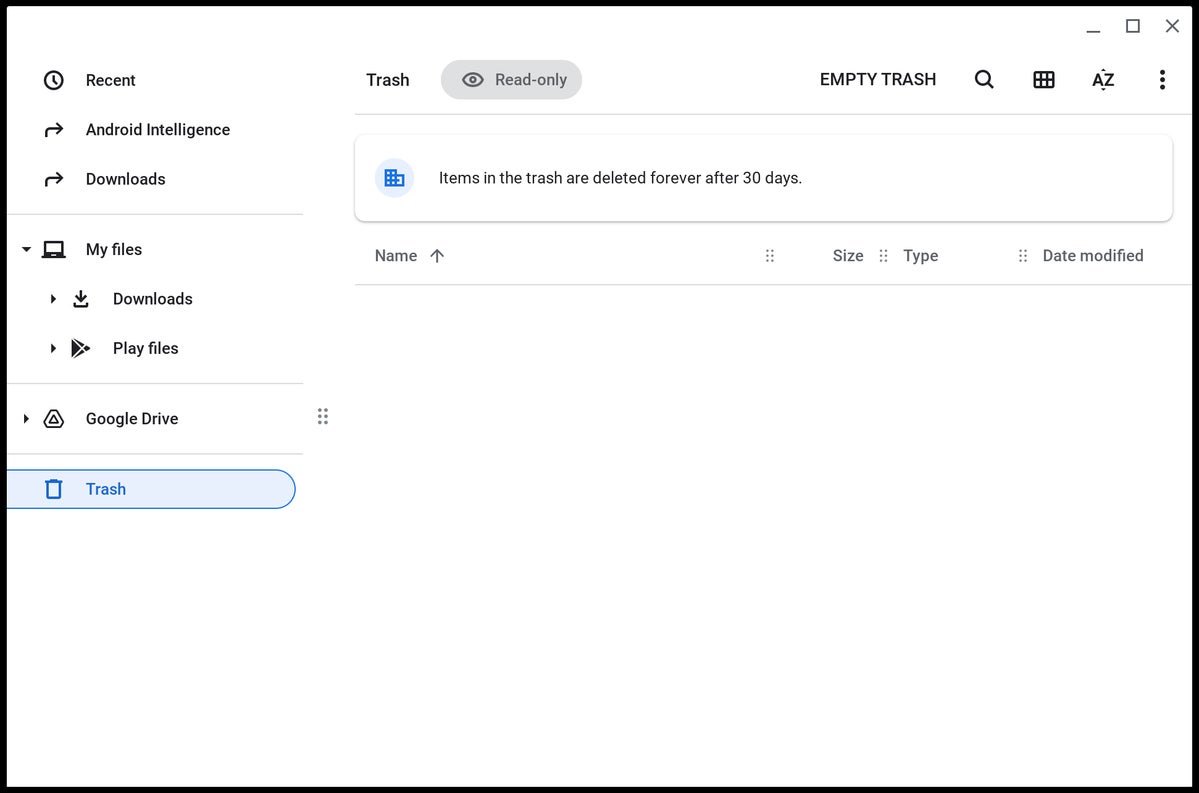
You'll be forgiven for not realizing it, but Chrome OS still doesn't have a trash can of any kind in its system-level Files app, which means you don't have an easy way to recover a file after you've deleted it.
Not crazy?
Sin embargo, no te enojes demasiado por la omisión: puedes arreglar el pequeño y curioso descuido de tu Chromebook en aproximadamente 10 segundos habilitando la opción de agregar basura occulta de su software. All it does is bring a new Long Trash area to the Files app main menu so that whenever you delete something you have a 30 day window where you can restore it if usted lo desea.
 https://www.LaComparacion.com/article/3656409
 I mean, really, the only question for you is why maybe you wouldn't want this on your computer.
To add it:
- Take chrome: flags in the address bar of your browser.
- Search waste on the screen that appears.
- Find the line labeled "Enable File Recycle Bin" and change its setting to "Enabled."
- Make a small informal template (optional but highly recommended).
- Click the blue Restart button at the bottom of the screen.
Who knew a simple dump could be so satisfying? !
Hey, want even more Google insights? Grab my free weekly newsletter for next-level tips delivered to your inbox every Friday, and get three bonus tips on your favorite topic right now.
Copyright © 2022 IDG Communications, Inc.